A custom home starts with choices that reflect how you want to live. You might picture a quiet office, generous natural light, or rooms that give family members more privacy. Turning those ideas into a finished home takes a coordinated plan, careful design, and a clear understanding of the building site.
If you want to build a custom home, it helps to know what happens at each stage. This step-by-step guide walks through the custom home building process, from the first look at the land to the final inspection.
Step 1: Understand the Home Site
Before designing your home, learn what the property makes possible. The shape and slope of the lot, access from the street, existing trees, drainage, and utility connections can all influence the design. Sunlight and neighboring buildings may also affect where you want to place windows and outdoor living areas.
If you are still purchasing land, reviewing site conditions early can help you recognize opportunities and constraints before committing to a particular vision. If you already own the lot, the same review gives the design team a practical starting point.
Local zoning and other property requirements also need attention. A floor plan should be developed for the actual site, rather than assuming that a design suited to another lot will work on yours.
Step 2: Define How You Want to Live
A custom home is an opportunity to tailor rooms to your routines. Think about how your household uses its current space. Which areas feel crowded? Where do you need quiet? How often do guests visit, and how might your needs change over time?
Make a list of priorities before focusing on finishes. You may want bedrooms separated from shared living areas, a flexible room for work or guests, or an easy connection between the house and the yard. These choices give your builder and design team a clearer picture of the home you want to create.
The goal is to distinguish what the home must do from features you would simply enjoy having. That clarity will help guide decisions throughout the home building process.
Step 3: Develop the Floor Plan and Architectural Design
With the site and your priorities in mind, the design team can begin shaping the floor plan. This is where room sizes, circulation, window placement, and the relationship between indoor and outdoor spaces come together.
Look closely at daily movement through the house. Is there a convenient place to leave coats and bags? Can someone work quietly while others use the main living area? Does the plan provide enough storage without interrupting the flow between rooms?
Architectural design also considers how the home looks and works from the outside. Its placement on the lot, roofline, and exterior finishes should support the interior layout and respond to the setting. Revising these decisions on paper is part of building a home that feels coherent when it is finished.
Step 4: Finalize Plans and Obtain Permits
Before construction starts, the project needs construction documents that show what will be built. The plans must address the applicable requirements for the property and the proposed home. They are then submitted for the necessary permit review.
This pre-construction stage may involve questions or revisions. The exact process and timeline depend on the project and its location. Finalizing the plans before work begins gives everyone involved a shared reference for the construction process.
Step 5: Prepare the Site and Build the Structure
Once the required approvals are in place, physical construction can begin. Site preparation comes first, followed by the work needed to create the home’s foundation and structural frame.
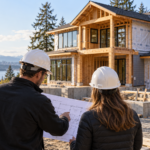
This stage makes the floor plan visible in a new way. You can begin to see the shape of rooms, the placement of windows, and the relationship between floors. At the same time, your builder coordinates work according to the plans and addresses site conditions that become clear during construction.
A custom home construction timeline should allow for the complexity of the home, the property, and the required inspections. Your builder can explain the sequence for your specific project as work progresses.
Step 6: Install Building Systems and Finish the Spaces
After the structure takes shape, work continues on the systems and materials that make the house comfortable and usable. Electrical, plumbing, heating, and ventilation work must be coordinated with the layout. Insulation and drywall then bring the rooms closer to their finished form.
The selections process becomes especially visible at this stage. Flooring, tile, doors, lighting fixtures, and other finishes give each room its character. Decisions about these details should support the way you plan to use the space, not just how it looks in a sample.
Outside, exterior finishes help protect the home and complete its appearance. Inside, careful attention to each fixture and finish brings the architectural design into everyday life.
Step 7: Complete Inspections and Prepare for Move-In
A finished home needs more than its final coat of paint. Required inspections occur at applicable stages of construction, and the project must reach the approvals needed before it can be occupied. The builder also reviews remaining details and addresses items that need attention.
For the homeowner, this is the time to learn how the new home works: where important controls are located, how to care for selected materials, and what information to keep for future reference. A thorough handover helps you settle into the home built for your household.
Conclusion
The custom home building process connects a series of decisions: choosing a suitable site, defining your priorities, designing the floor plan, securing permits, constructing the home, and completing the required inspections. Understanding each step makes it easier to take part in decisions and see how your ideas become a finished home.
Ready to take the first step toward your custom home? Contact QH Build to discuss your property, your goals, and the home you want to create.
Written by Andrii Klubov